The keyboard on my laptop (a 3+ year old Thinkpad Yoga) recently went on the fritz. My warranty was expired, so I decided to take it into the local shop to get they keyboard replaced.
Big mistake. The owner has no clue how to work with convertibles like the Yoga. He had to outsource the job to another person instead. It took him two days just to get a quote back to me, and the original 3-5 day estimate ended up taking almost two weeks. When I got it back, the TrackPoint wasn’t working (TrackPoints are pretty much the main reason I even have a Thinkpad these days). I asked the shop to fix it, but that ended up taking another two weeks.
When I got it back again, the TrackPoint technically worked (“my guy tested it” says the owner) but it still didn’t feel right. There was a lot more resistance moving the stick down / right than up / left, and on top of that, the keyboard as a whole didn’t lock properly when converting to tablet mode. At that point though, I was pretty fed up with the long turnaround, so I just took my laptop and decided to take a crack and fixing it myself.
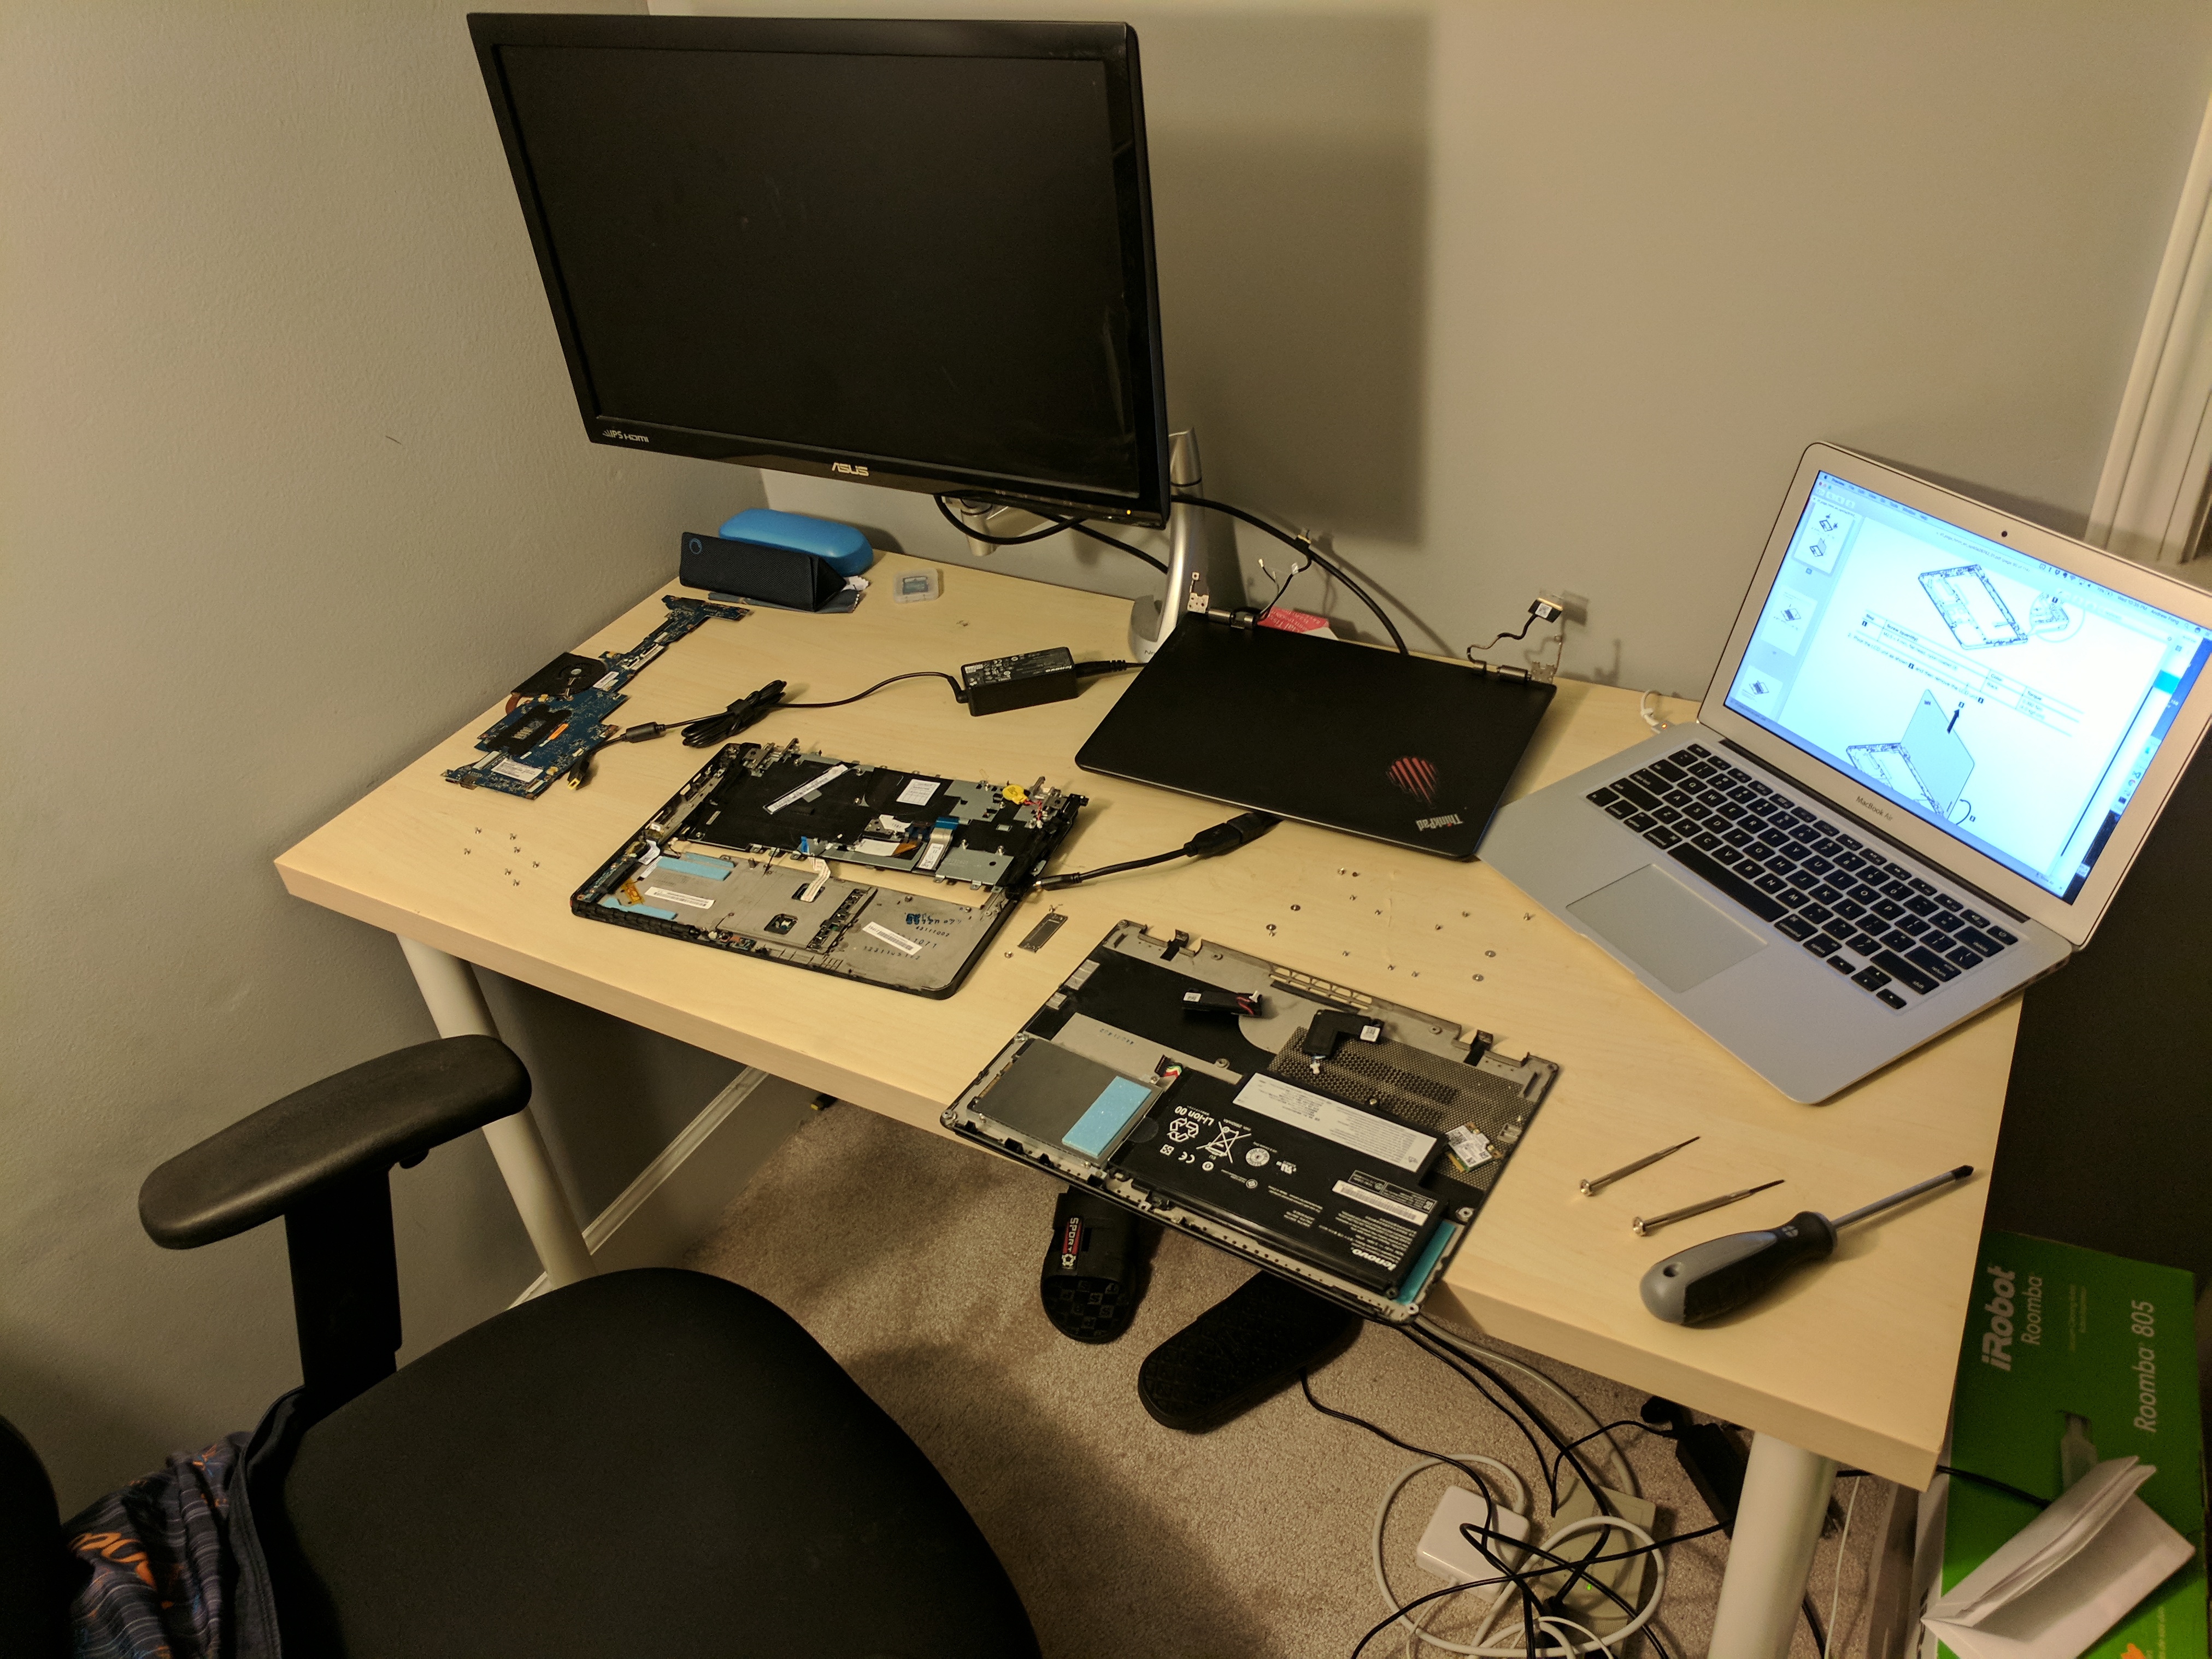
Fortunately for me, there’s an online manual for how to take apart my Thinkpad(PDF), plus plenty of videos as well. Keyboard replacement (for my laptop at least) is a bit of a hassle, since it requires removing the battery, hard drive, and main board just to get to the keyboard assembly.
Upon getting to the keyboard assembly, I noticed that the piece of medal supporting the TrackPoint seemed to be only loosely attached to the rest of the keyboard. I also noticed a bit of a rattling noise when I was removing the keyboard assembly from the case.
As it turns out, I literally had a couple of screws loose. In this case, the two screws are located under the ‘G’ and ‘H’ keys. I had to pop up two keys off in order to get to them.
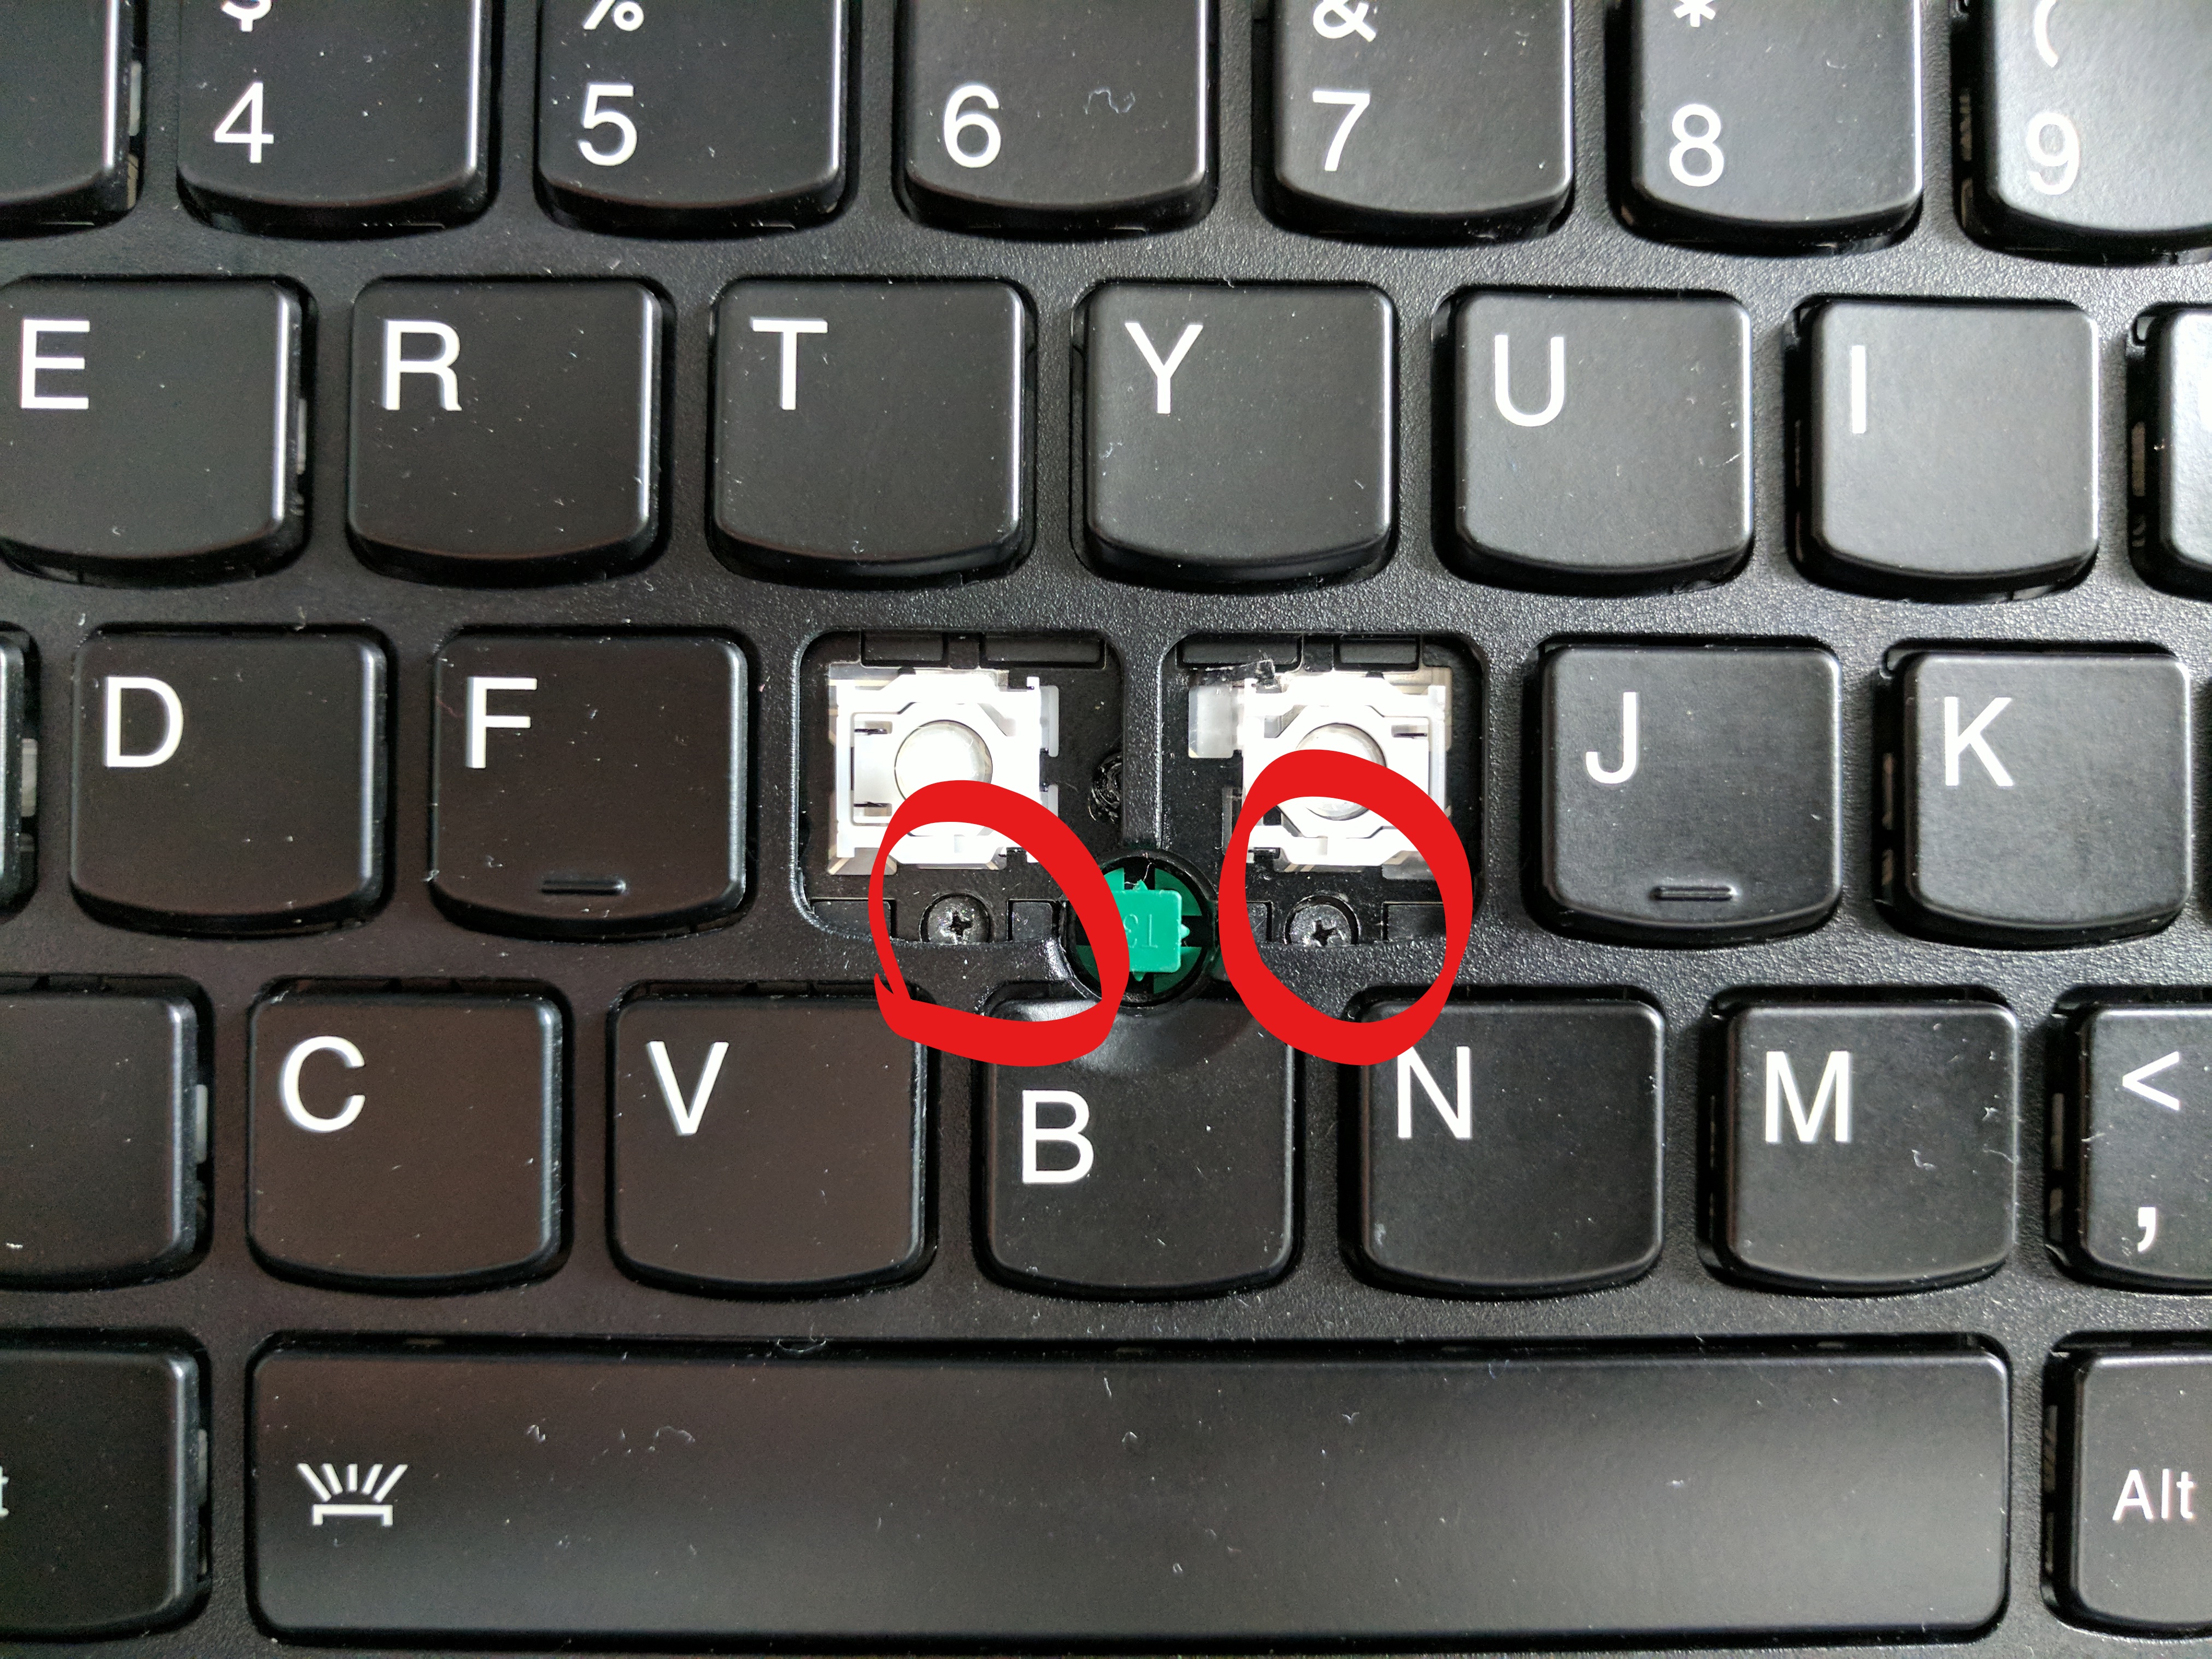
The screws are quite shallow though. You can drop them in and twist but they won’t actually catch onto the TrackPoint assembly unless you reach underneath and push the TrackPoint assembly upward a little.

My guess as to what happened was that the person who fixed my laptop didn’t give much mind to the screws not locking in place and assumed it was fine.
It wasn’t fine of course. Those two screws popped out. Without those screws, applying pressure to the Trackpoint caused the entire thing to sink. Once sunk, the TrackPoint would get stuck underneath or rub against a key, which increased resistance to the stick. Or it would just tilt slightly in one direction, which again, caused the TrackPoint to favor one side over another.
Tightening the screws fixed my TrackPoint issue. Putting everything back together was a bit of a bear though. If you have a similar issue, I recommend trying to screw in the TrackPoint from above (just pop off the ‘G’ and ‘H’ keys) first. As noted, the screws might not lock in place though, so if that happens, you’ll have to take things apart in order to apply pressure to the TrackPoint assembly from below. And definitely see if you can do it without taking out the keyboard assembly itself.
In my case though, I still had to deal with the keys not locking properly in place when the screen was rorated back. So I had to remove and re-insert the keyboard assembly. The track when re-inserting is to properly align the two “hooks” on the top of the keyboard with the pins (?) on the LCD hinge. Basically, what’s supposed to happen is that the pins on the LCD hinge end up catching the keyboard assembly hooks when the hinge is rotated 180 degrees back. The pins pull the hooks back, which in turn pulls the keyboard’s keys downward and locks them in place.
Anyhow, my laptop is working again now (mostly – it still runs a little hot and noisy) but at least the TrackPoint is usable again.
Comments